Proxy環境下では、WSL上からネットにアクセスしたりapt-getしたりするには、別途WSL側にもProxy設定が必要となります。今回はその設定方法を説明します。
Proxy未設定時のエラー#
Proxyを使っている環境でWSLでのProxy設定をしていない場合、例えばsudo apt updateを実行すると下記のようなエラーが出ます。
ぱっとみ、DNS関係のエラーにも見えますが、Proxy未設定でもこのエラーが出ます。
(DNSの問題でもおそらく同じようなエラーが出ると思いますが、今回はProxyに絞って説明します)
 1
 2
 3
 4
 5
 6
 7
 8
 9
10
11
12
13
14
15
16
17
18
19
20
21
22
23
24
25
26
| $ sudo apt update
Ign:1 http://archive.ubuntu.com/ubuntu xenial InRelease
Ign:2 http://security.ubuntu.com/ubuntu xenial-security InRelease
Ign:3 http://archive.ubuntu.com/ubuntu xenial-updates InRelease
Err:4 http://security.ubuntu.com/ubuntu xenial-security Release
Something wicked happened resolving 'security.ubuntu.com:http' (-5 - No address associated with hostname)
Ign:5 http://archive.ubuntu.com/ubuntu xenial-backports InRelease
Err:6 http://archive.ubuntu.com/ubuntu xenial Release
Something wicked happened resolving 'archive.ubuntu.com:http' (-5 - No address associated with hostname)
Err:7 http://archive.ubuntu.com/ubuntu xenial-updates Release
Something wicked happened resolving 'archive.ubuntu.com:http' (-5 - No address associated with hostname)
Err:8 http://archive.ubuntu.com/ubuntu xenial-backports Release
Something wicked happened resolving 'archive.ubuntu.com:http' (-5 - No address associated with hostname)
Reading package lists... Done
E: The repository 'http://security.ubuntu.com/ubuntu xenial-security Release' does not have a Release file.
N: Updating from such a repository can't be done securely, and is therefore disabled by default.
N: See apt-secure(8) manpage for repository creation and user configuration details.
E: The repository 'http://archive.ubuntu.com/ubuntu xenial Release' does not have a Release file.
N: Updating from such a repository can't be done securely, and is therefore disabled by default.
N: See apt-secure(8) manpage for repository creation and user configuration details.
E: The repository 'http://archive.ubuntu.com/ubuntu xenial-updates Release' does not have a Release file.
N: Updating from such a repository can't be done securely, and is therefore disabled by default.
N: See apt-secure(8) manpage for repository creation and user configuration details.
E: The repository 'http://archive.ubuntu.com/ubuntu xenial-backports Release' does not have a Release file.
N: Updating from such a repository can't be done securely, and is therefore disabled by default.
N: See apt-secure(8) manpage for repository creation and user configuration details.
|
proxyの設定の確認#
WSLのプロキシ設定は、基本的に現在Windows側にて設定されているものを使えばOKです。
そこでまずは現状のプロキシ設定を確認します。
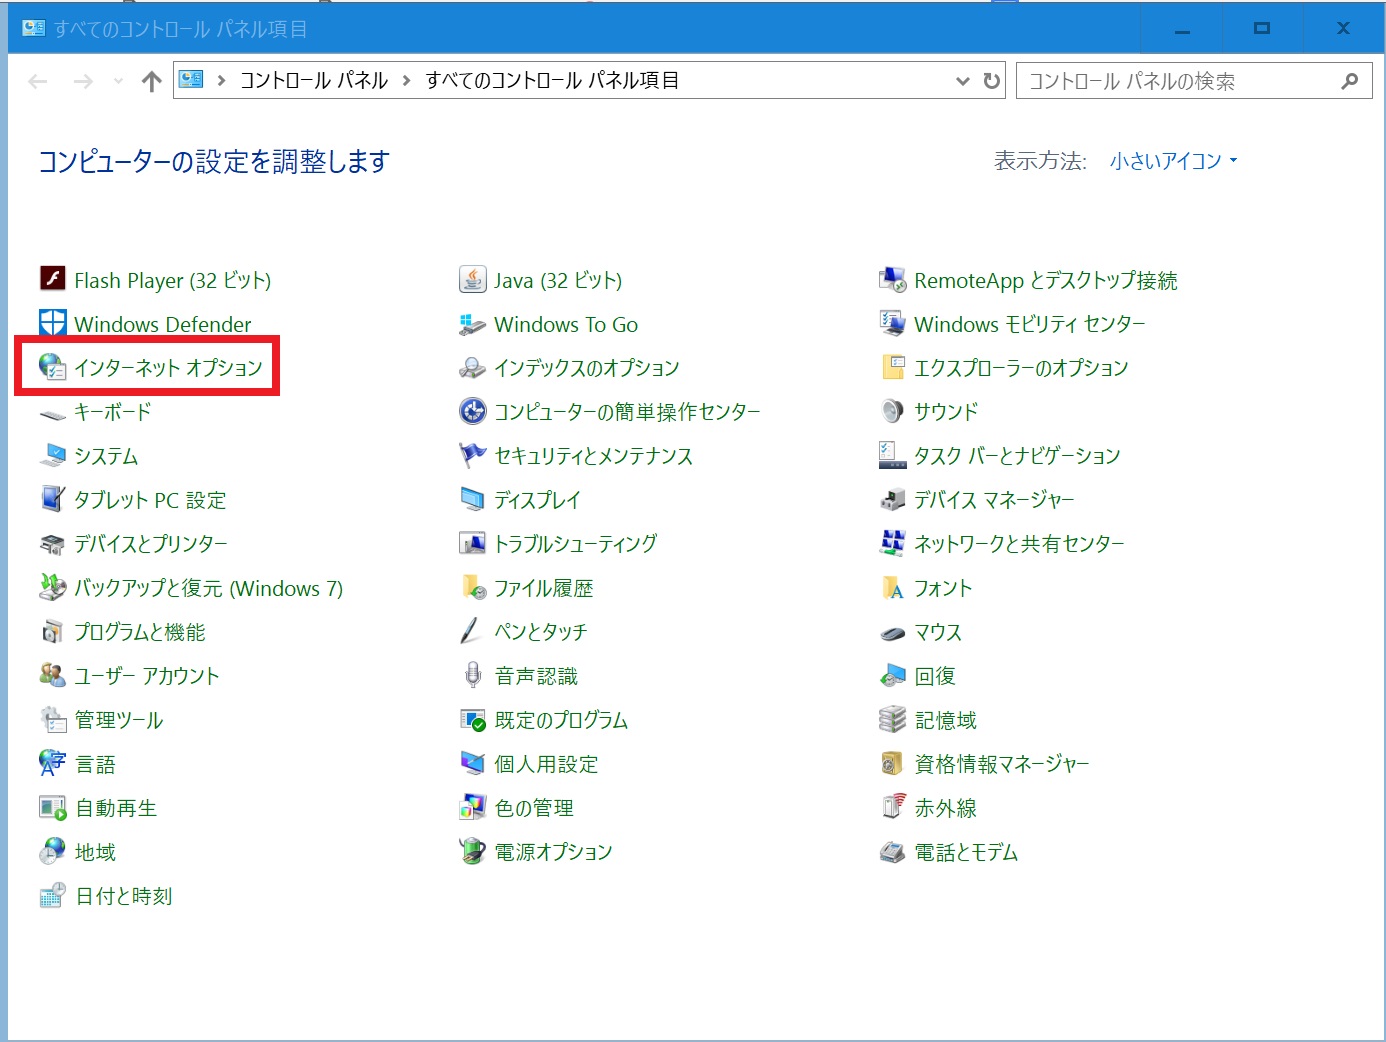
まずはじめに「コントロールパネル」を開きます。そのなかの「インターネットオプション」を選択します。
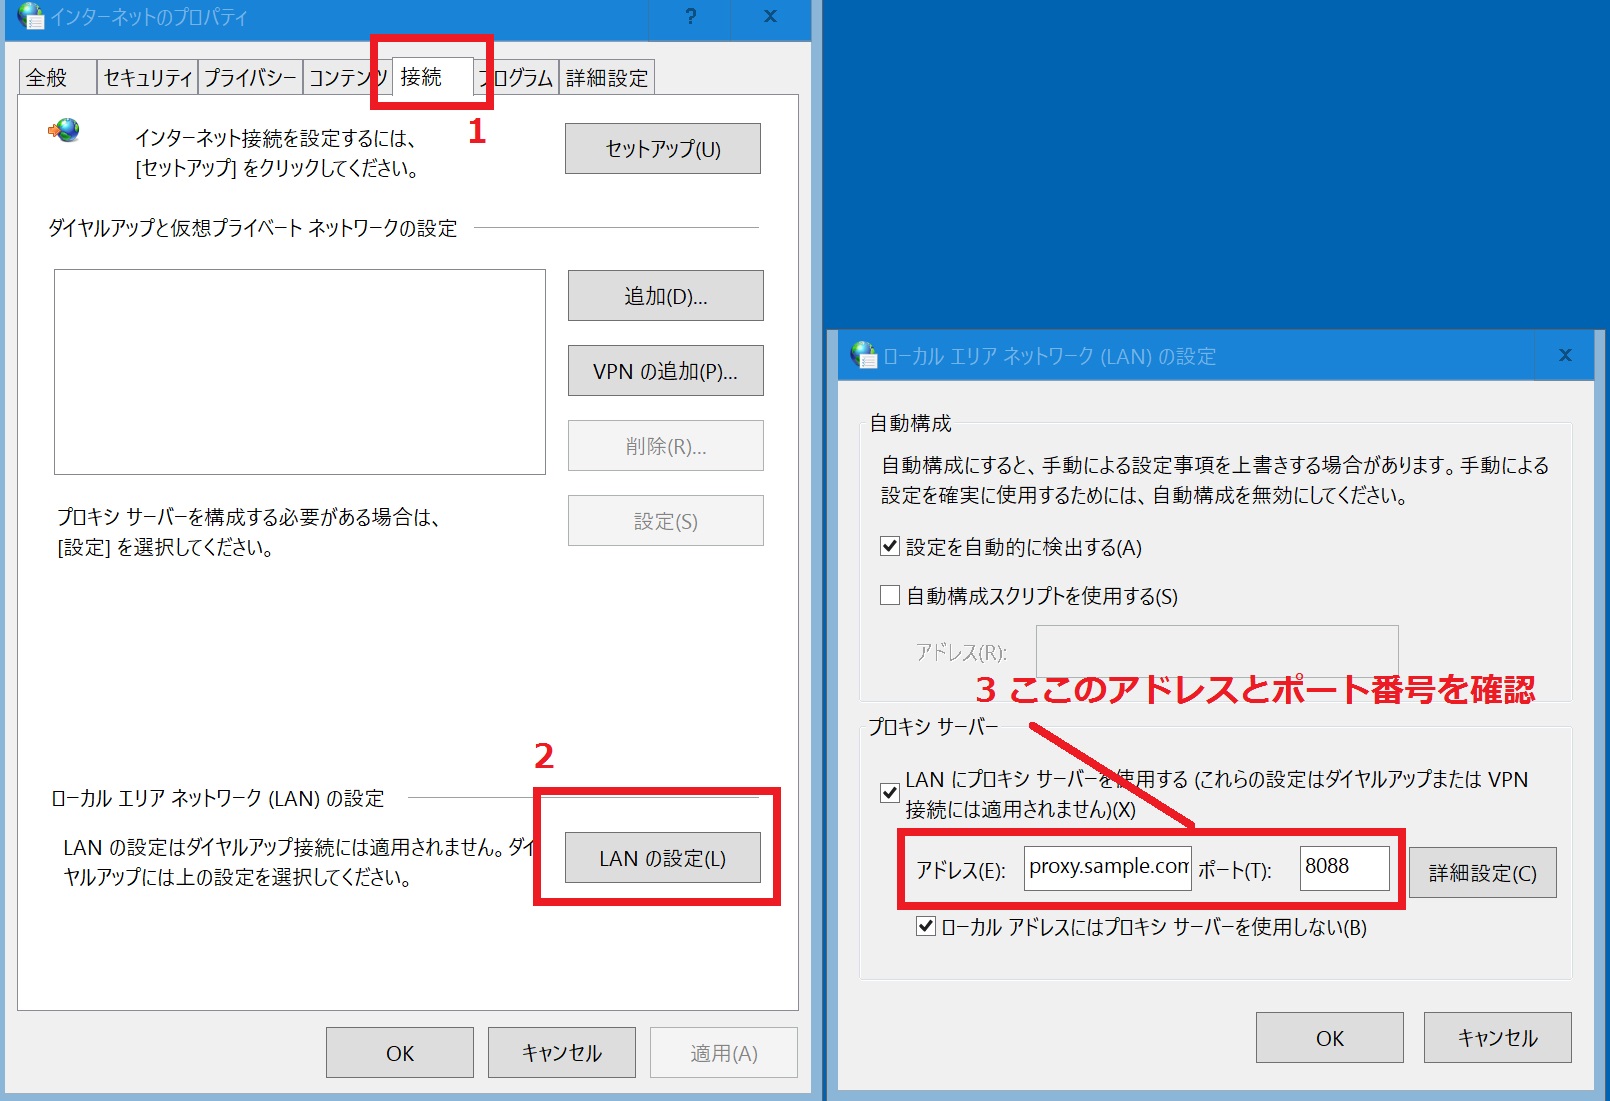
次に、「接続」タブを選択し「LANの設定」をクリックします。
そうするとProxyなどの設定をするウィンドウが開きます。そこにProxyのアドレスとポート番号が書いてありますのでそれをメモします。
これでプロキシ設定の確認は終わりです。
PAC を使っている場合#
基本的に上記の方法でいいのですがもしPACを使っている場合はひと手間いります。
もし上記の右の設定画面にて「自動構成スクリプトを使用する」にチェックが入っていればPACをつかっています。
その場合は WSLでのProxy設定方法|PACファイルでも を参考にして見てください。
http_proxy変数の設定#
http_proxyとhttps_proxyという環境変数を設定する必要があります。
ホームディレクトリ直下の .bashrc に下記のように設定を書いておけば良いと思います。
これでログイン時に自動で設定されます。
proxy-host proxy-portには、先ほど確認したプロキシのアドレスとポート番号を入れてください。
usernameとpasswordは、WSLのではなくProxyのユーザ名とパスワードです。
1
2
3
4
5
6
| export ftp_proxy=http://username:password@proxy-host:proxy-port
export http_proxy=http://username:password@proxy-host:proxy-port
export https_proxy=http://username:password@proxy-host:proxy-port
export FTP_PROXY=http://username:password@proxy-host:proxy-port
export HTTP_PROXY=http://username:password@proxy-host:proxy-port
export HTTPS_PROXY=http://username:password@proxy-host:proxy-port
|
apt.confの設定#
次にapt.confファイルの設定です。/etc/apt/apt.confにて下記を設定してください。
もし/etc/apt/apt.confがなければ新規に作成してください。行末の;を忘れないようにご注意ください。
1
2
3
| Acquire::ftp::proxy "http://username:password@proxy-host:proxy-port";
Acquire::http::proxy "http://username:password@proxy-host:proxy-port";
Acquire::https::proxy "http://username:password@proxy-host:proxy-port";
|
これで設定は終わりです。WSLターミナルをいったん終了して、再度起動してみてください。
sudo apt updateが成功すればOKです。
OK時は下記のような感じになります。
 1
 2
 3
 4
 5
 6
 7
 8
 9
10
| $ sudo apt update
Hit:1 http://archive.ubuntu.com/ubuntu xenial InRelease
Get:2 http://archive.ubuntu.com/ubuntu xenial-updates InRelease [109 kB]
Get:3 http://security.ubuntu.com/ubuntu xenial-security InRelease [107 kB]
Get:4 http://archive.ubuntu.com/ubuntu xenial-backports InRelease [107 kB]
Fetched 323 kB in 1s (181 kB/s)
Reading package lists... Done
Building dependency tree
Reading state information... Done
All packages are up to date.
|
curl の設定#
.bashrc にプロキシ設定を書いておけばこれは不要かと思いますが、参考までに書いておきます。
下記のような感じで .curlrc に設定をかけばOKです。
1
| echo 'proxy="http://username:password@proxy-host:proxy-port"' >> ~/.curlrc
|
/etc/environment#
これも無くても大丈夫かと思いますが、参考までに書いておきます。
/etc/environment の設定です。下記のように追記すればOKです。
1
2
3
4
5
6
| sudo bash -c 'echo "http_proxy=http://username:password@proxy-host:proxy-port" >> /etc/environment'
sudo bash -c 'echo "https_proxy=http://username:password@proxy-host:proxy-port" >> /etc/environment'
sudo bash -c 'echo "ftp_proxy=http://username:password@proxy-host:proxy-port" >> /etc/environment'
sudo bash -c 'echo "HTTP_PROXY=http://username:password@proxy-host:proxy-port" >> /etc/environment'
sudo bash -c 'echo "HTTPS_PROXY=http://username:password@proxy-host:proxy-port" >> /etc/environment'
sudo bash -c 'echo "FTP_PROXY=http://username:password@proxy-host:proxy-port" >> /etc/environment'
|
まとめ#
今回はWSLのProxy設定の方法を説明しました。~/.bashrc と /etc/apt/apt.conf に設定を追加すればOKです。ご参考になれば幸いです。